Once you have completed the number of stitches in the ring it is time to close the ring.
These are right handed directions, click here to go to the left handed directions.
Refer back to the begining pages if you need a refresher.
Right handed or Left
handed
Refer back to the picot pages for a refresher on picots.
Right handed Picots or Left
handed Picots
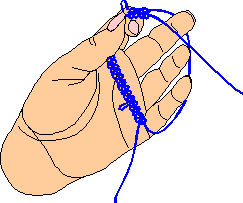
This practice ring has 2 stitches, a picot, 5 stitches another picot, 5 more stitches another picot and then 2 final stitches.
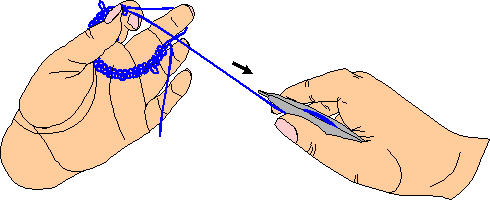
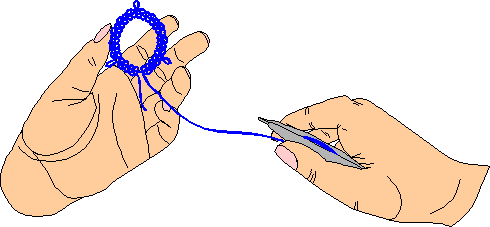
Losen the tension on your left pinkie. With your right hand, pull the shuttle thread gently while holding the last stitch between your left thumb and forefinger.
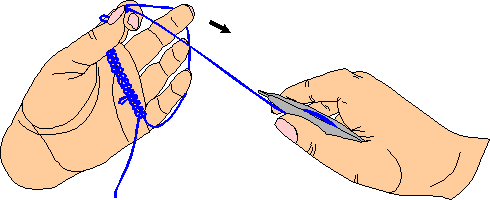
Do not pull too tightly. It will not come apart once you have pulled it into a ring. As a matter of fact, if you make a mistake and want to start over, it is easier to cut off the partially closed ring than to try and pick out the stitches.
I had to get out the big magnifying glass for this.
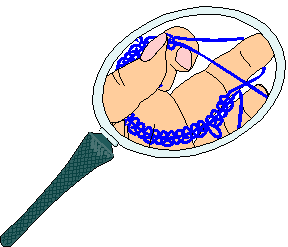
Here is the finished ring.
I hope this has helped you learn to tat.
On to Joining
Rings
or
Back to Carrie's Home Page
Using CorelDraw!(tm) and Corel Photo-Paint(tm) I drew the pictures from scans of my own hands and wrote the text myself. I hold all rights to this page except the arrows and magnifying glass which are CorelDraw!(tm) clipart.
-Carrie Carlson